|
|
|
||||||||||||||||||||||||||||
used office desks in Akron, Ohio used office cubicles in Akron, Ohio
used office supplies in Akron, Ohio
buy below wholesale
|
|
by GEOGRAPHICS
LED scrolling light bar ColorLights by GEOGRAPHICS
model: GEO4000E serial
No. G97100
|
||||||||||||||||||||||||||||

 Original retail approximately $450.00
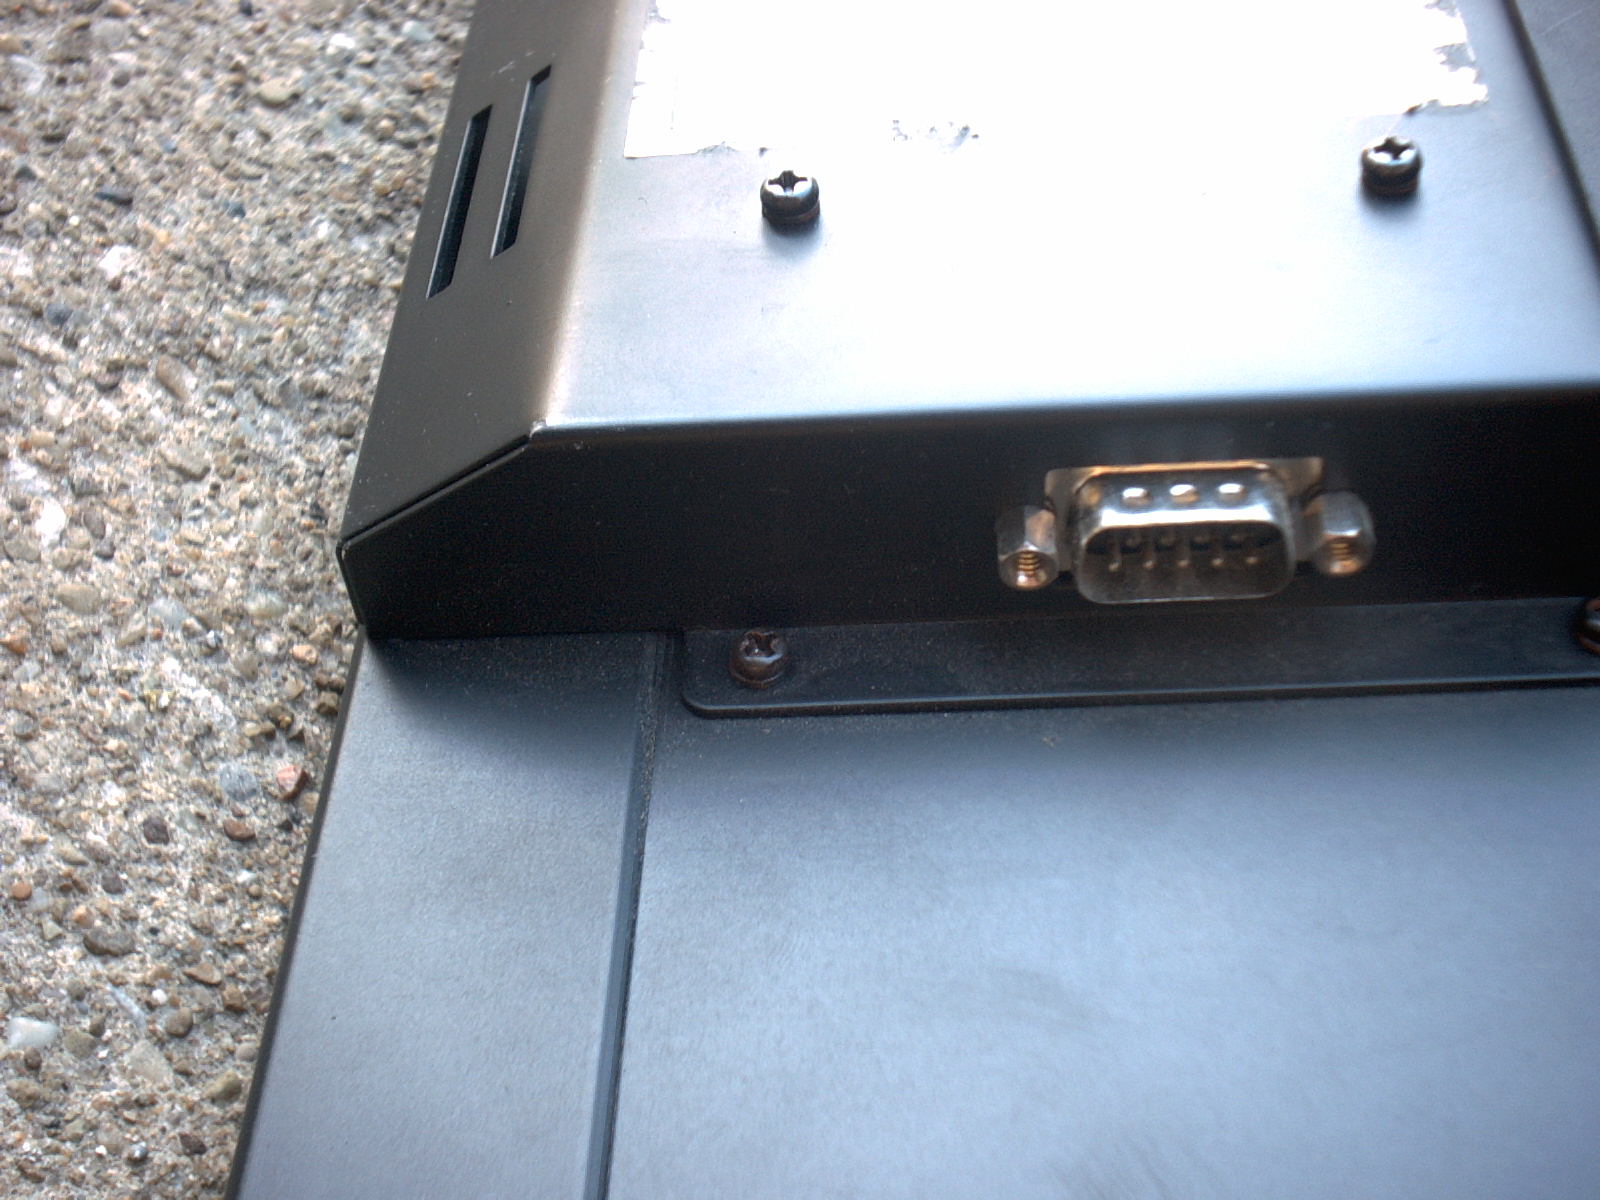 Serial Port backside |
 Label main |
 Label secondary |
no accessories available
Request a shipping quote for this item.
Will ship UPS ground.

![]() OUR INSANE price $
OUR INSANE price $20.00+shipping
SOLD
|
INTRODUCTION GeoNet is a software program for Windows and Windows 95. It allows you to create and display messages on a GeoGraphics multi-color moving sign or network of moving signs using your PC. Messages created on the computer can be saved on the disk for future use. We suggest you read through the Signs' instruction manual and do the examples provided to familiarize yourself with how the signs operate. BACKUP GeoNet Before you use the GeoNet program, make a backup copy on the disk using windows file manger or the DOS commands copy or diskcopy. GeoNet is not copy protected. Please support our policy by not giving away copies to people who have not paid us for them. PACKING LIST Your package will contain some or all of the following items depending on whether you purchased GeoNet together with a sign or as a separate GeoNet kit. i.Two floppy disk containing: GeoNet Files: GeoNet.EXE The main program GeoNet.HLP A file containing the help information Welcome.GEO A demonstration message GeoNet.COV Codes to convert message GeoNet.BMP 256 color Bitmap for drawing graphics GeoNet.INI Initialization file Modem.INI Modem initialization file A complete list of GeoNet Files Space needed for installation: Windows Files: 2.70 MB GeoNet Files: 1.10 MB ii. One Geo Cable If any of these items are missing from your package, please immediately contact your distributor for assistance. GETTING STARTED SYSTEM REQUIREMENTS GeoGraphics GeoNet requires the following hardware: An IBM Personal Computer or compatible that runs Windows 3.1 or 95. 4 MB of free hard disk space At least 2 MB of installed memory. (4 MB Recommended) CGA, EGA or VGA monitor (for best color operation). RS232 COM port - [2 COM ports are recommended for Modem connected networks]. Adapter Cable. See the Display's User guide for details of cable connections. CONNECTING YOUR PC TO YOUR GEOGRAPHIC SIGN First, ensure that your sign and your PC are turned off and disconnected from the power. Then take the `Adapter Cable' included with your package and plug into the back of the sign. NOTE - DO NOT PLUG ANY OTHER CABLE DIRECTLY INTO YOUR SIGN AS IT MAY DAMAGE YOUR SIGN. Then to connect your PC, you can do one of two things depending on the location of the signs relative the PC and the type of COM port on your PC. If the COM port on the back of the computer is a 9-pin type, you can simply plug adapter directly into your computer or use an extension cable to reach the computer. If the COM port on the back of the computer is a 25-pin type, you will need to buy a 25-pin female to 9-pin male converter plug/cable to plug into your PC and then you can simply plug the connector on the adapter cable into the 9-pin male plug at the end of the converter at the computer, directly or via an extension cable. You can now turn on your display and computer. It is IMPORTANT that the power be DISCONNECTED whenever you connect the cable onto the Sign. BACKING UP YOUR DISK The first thing to do before you use your disk is make a backup copy. You can use the File Managers Diskcopy command as follows: Place the distribution disk in drive A and select Disk / Copy Disk from the file manager window. Follow File managers prompts to back up the distribution disk. Put the distribution disk in a safe place and use the backup from now on. If ever the backup is damaged or destroyed, you can always make a new copy from the distribution disk. Setting up GeoNet 1. Insert the GeoNet disk into a floppy drive A or B 2. From Program Manager, select File menu and choose run 3. Type A:\setup and press enter GeoNet will begin the setup procedure. The setup program copies all necessary files to your hard drive and creates the necessary directory. Starting GeoNet and your First Message To Start GeoNet find the GeoNet program group in Program manager. Double click on the icon then double click on the GeoNet icon to start the program. The first window that appears will be the Editor window. If this is the first time you have run GeoNet the sign settings form will be visible in the middle of the editor window. Select the sign model and baudrate of the sign you want to send a message to. Also enter in the signs address. If you haven't changed the signs address with the remote control leave this address as 1 ( The default). Select the Com Port that your sign(s) is connected to or choose Remote then select a Com Port, if sending messages through your modem. After checking that all information is correct Choose OK to close the sign settings form. This option is available from the editor window by selecting sign then settings from the menu. Your First Message You should start GeoNet if you haven't done so already. (See Starting GeoNet for help.) GeoNet will start with the editor window. Type in your message in this window. For example type HELLO WORLD After typing in the message of your choice select File from the Menu at the top of the editor window then select Save. You will be asked to save your message. Type Hello or another name and choose OK. Your message has been saved. You can send this message to your sign if connected. After checking to make sure the sign settings are correct. Select Sign / Send Message from the editor menu or Click on the Send button on the bottom of the editor window. The send button will send the message immediately to the sign selected in the sign settings form. If you select Send Message from the menu you will be able to choose the sign, message channel and sequence to display before sending the current message. After you send the message a gauge will appear showing the progress of the send. You may cancel the send at anytime. Large messages may take a few minutes to send. GeoNet has many options that can be included into messages depending on the sign model selected. You should explore GeoNet to discover where all the options are located and to familiarize yourself with GeoNet. Included with GeoNet is a sample message called Welcome.geo to view this message. First save any message you are working on then choose file / open from the editor window menu. Select Welcome.geo from the list of files to open. Choose OK. The message is now displayed in the editor window. GeoGraphics Inc. 1997 Version 2.10 |
![]()
|
|
|||
|
|||
 |
![]()
![]()
 HOME
Desks
Cubicle wall
partitions
Office Supplies
HOME
Desks
Cubicle wall
partitions
Office Supplies
Bicycles Antiques & Collectables Computers and accessories Die Cast Collectables
Pet Supplies shipping Sporting Goods Tools Video & Audio Equipment
I dare you to find a lower price
![]()
anywhere!
USED OFFICE FURNITURE
Used Office Equipment
Used Office Supplies
Used office cubicles
Used office desks
Used office partitions
|
|
|
NEWS
|
|
|
INSANE PRICES
Holiday shopping SALE!
Portable walls
office workstations
Die cast collectible cars
Video movies
used bicycles
used tools